Published on October 24, 2017
New Hobby: Firmwares and Little Devices
I started coding around ten years ago and I still love it. But honestly, sometimes it's boring to do the same thing for a long time.
Fortunately, my employer gives me quite impressive challenges and I'm not bored with my job.
(I had to add this, otherwise you know :D).
I tried doing some machine learning (and deep learning) stuff. Those are very challenging, but I couldn't go too far. (Maybe that's something too challenging for me.)
Of course, I studied a bit about cryptocurrencies, like Bitcoin and Steemit, and I read a lot of papers. I know most of them are not scams, but they rely heavily on speculation and risk.
That's not worth my time. (And I don't have money to risk.)
Little Devices
One of my WiFi device experiment.
As you can see, I'm playing around with some little devices. Some of these tools may be pretty new to you. Don't worry, I was just like you a few week's back.
This is how I got started.
I am building a new house and I wanted to make it a Smart Home. So, I was searching for devices and systems I could use. I already bought a Phillips Hue Kit and a set of Hue bulbs.
So, I was wondering, what if I could build them from scratch?
That's a really good challenge, and I thought it would be cheaper as well.
But that's fake news. You can buy a Philips Hue WiFi bulb for less than $15 and there are a ton of cheap smart home solutions on eBay.
Arduino
Arduino: this is where anyone would start, because it's that popular. Just like everyone, I ordered a Arduino Kit from a local dealer.
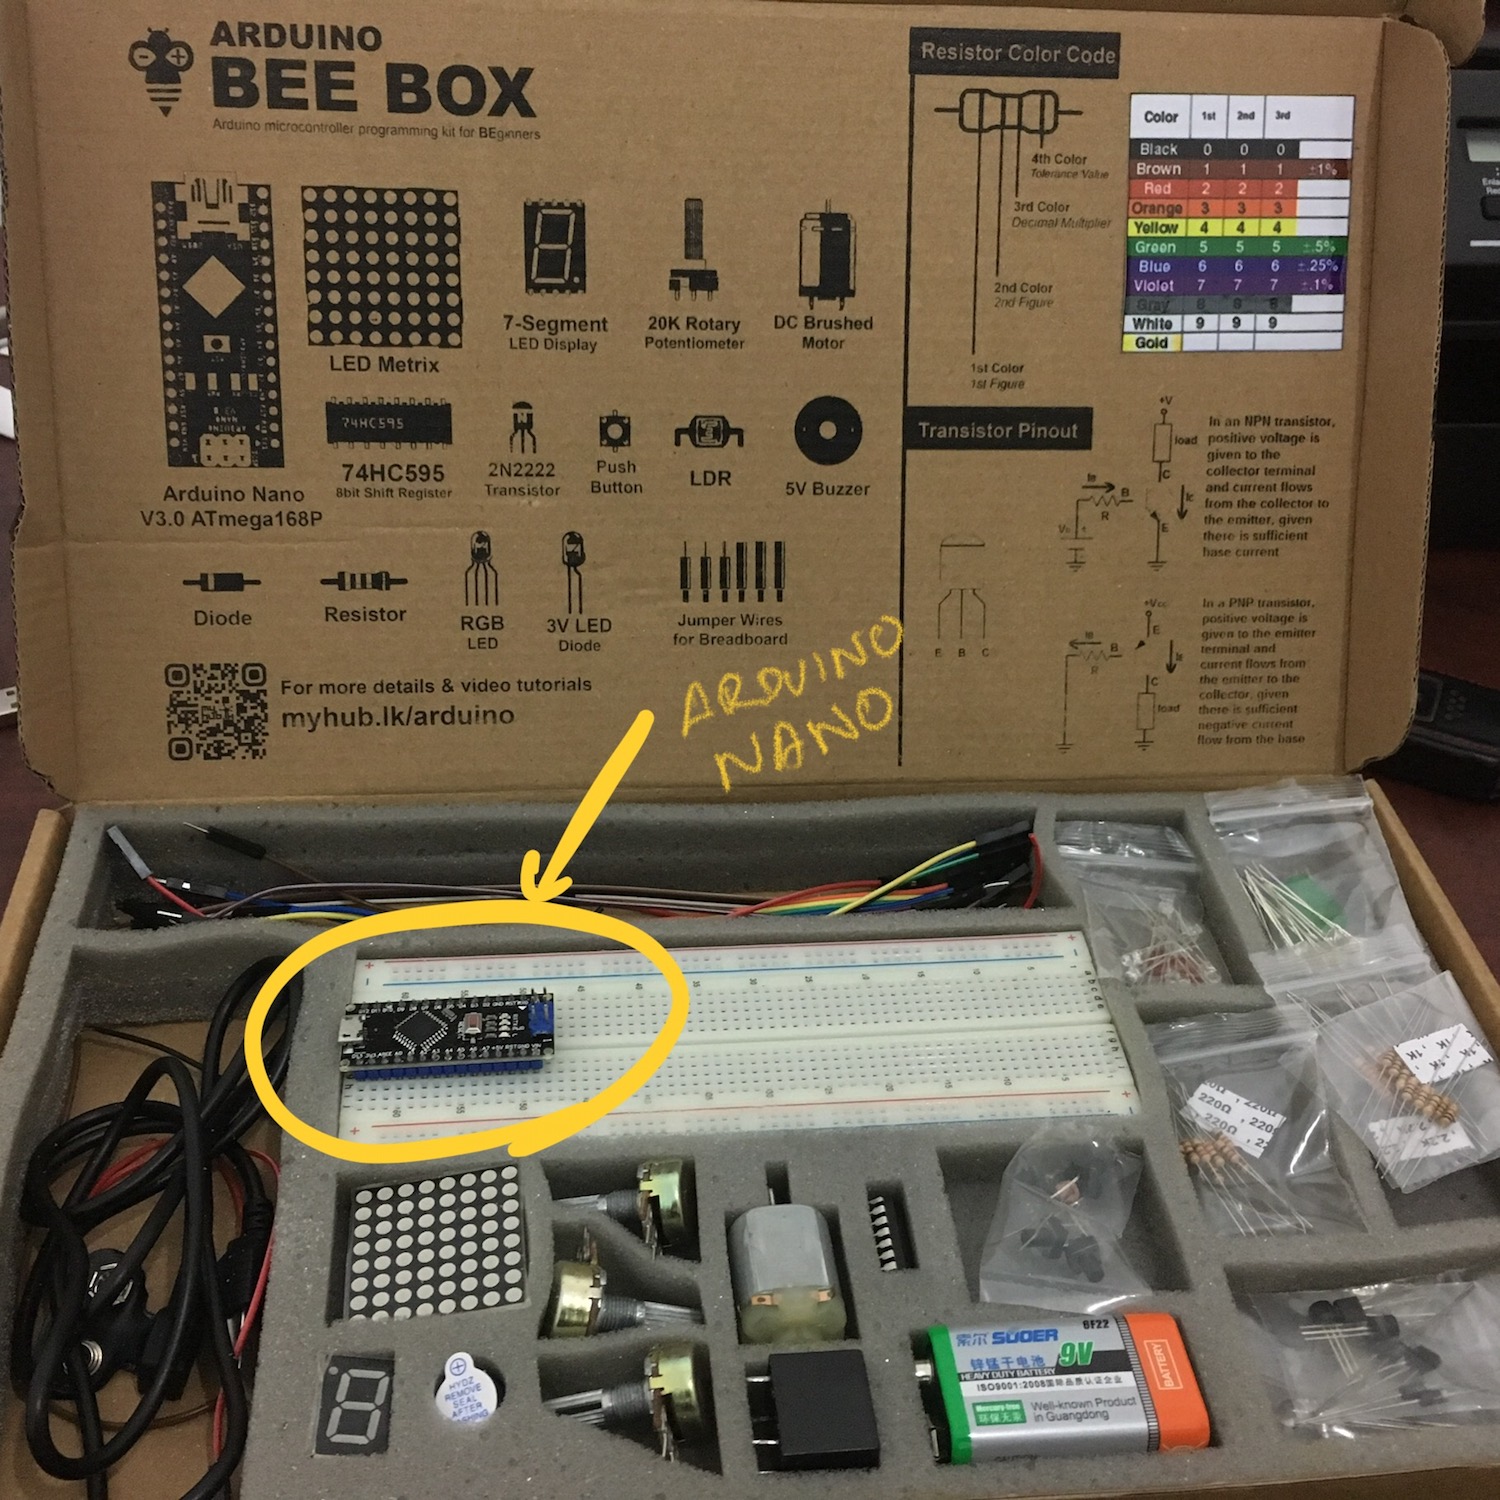
My Arduino kit. It's a locally assembled kit.
I also found a very nice website: Tinkercad Circuits. It's a way to refresh my high school electronic lessons and play around with them in a virtual environment.
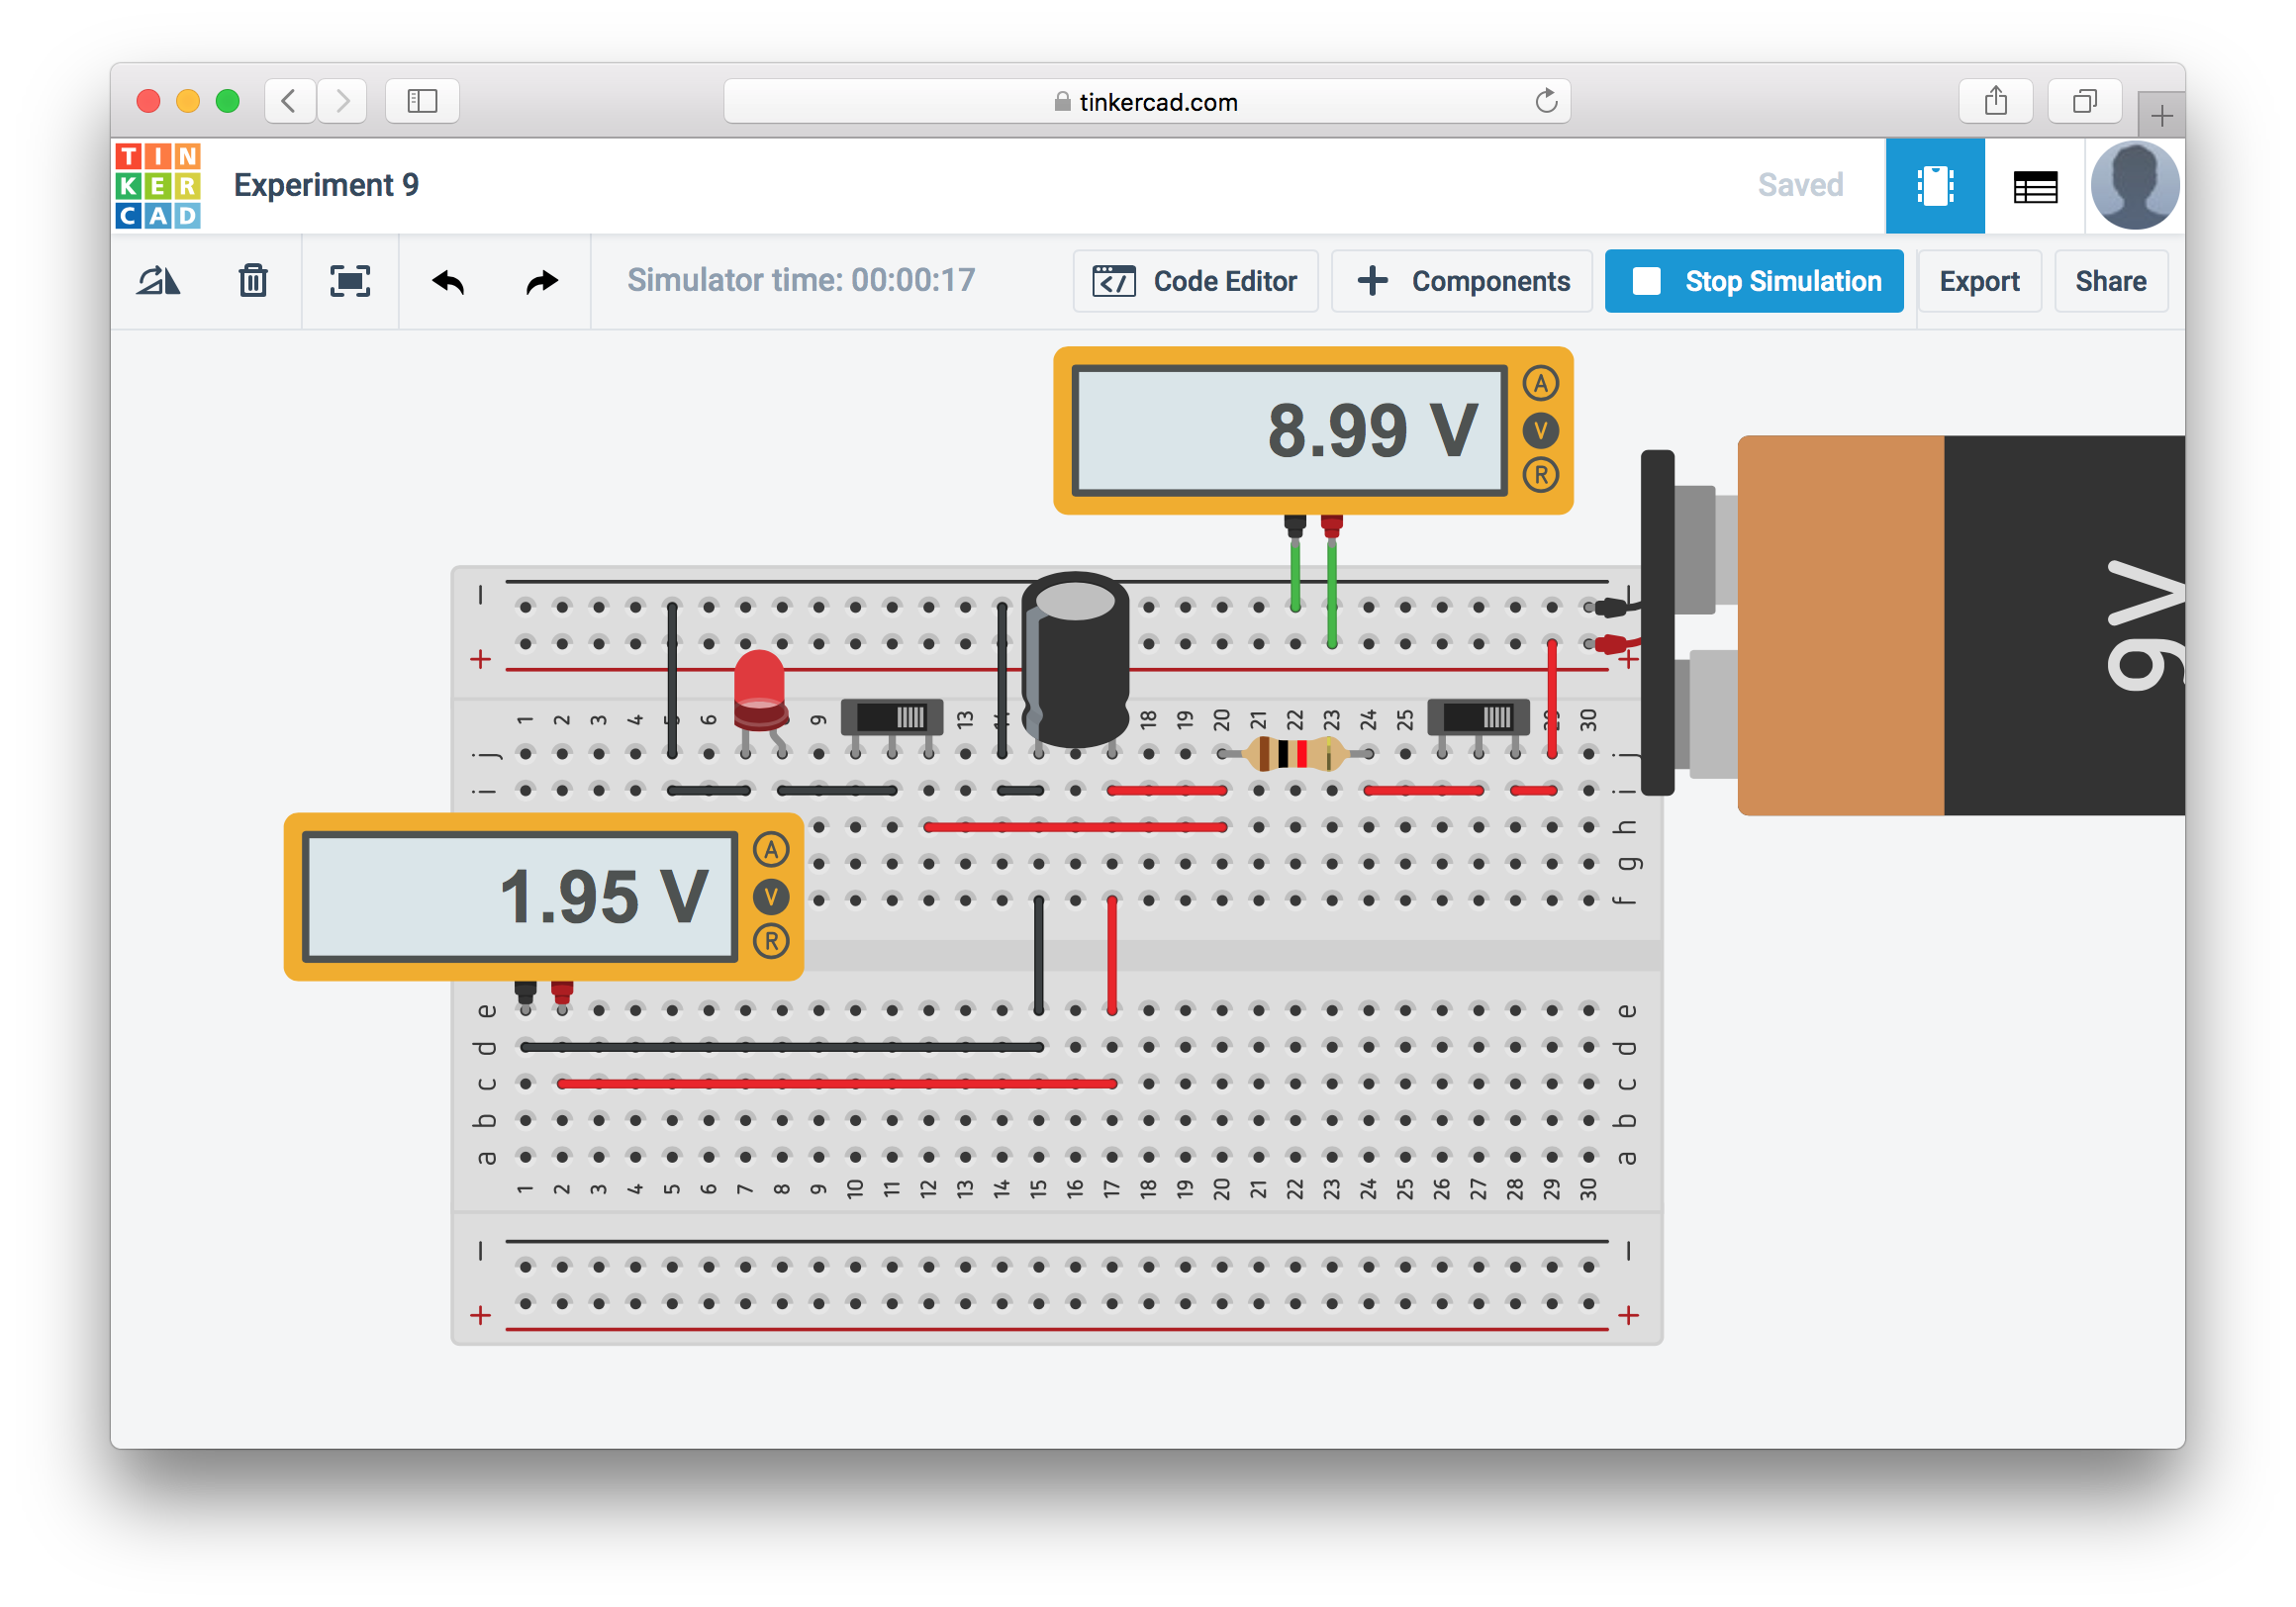
A simple capacitor experiment in Tinkercad.
Using my Arduino kit, I played around a bit and I blinked some LEDs and turned on some motors. That was fun. However, my fun was limited because my Arduino kit had only a few components.
So, I ordered a sensor kit from eBay and it is on its way. I'll have some busy weekends soon.
My wife will definitely hate this as she'll lose some shopping time.
She's also worried about me as I blew up a few components with smoke.
(I was supplying AC current to a DC-to-DC step-down converter, assuming it's an AC to DC one.)
Fun facts
Even thought Arduino is so popular, there are nearly no production devices built on top of Arduino. Do you know why?
Because it's a development platform for a microcontroller series called Atmel ATmega. Arduino has a pretty solid IDE, active developer base and a lot of modules like sensors and activators. That's why it's so popular.
After developers have prototyped with it, they can build real world products using the ATmega microcontroller or something else that is better suited.
Meet ESP8266
If you are not much into this kind of stuff, I am pretty sure you haven't heard about ESP8266.
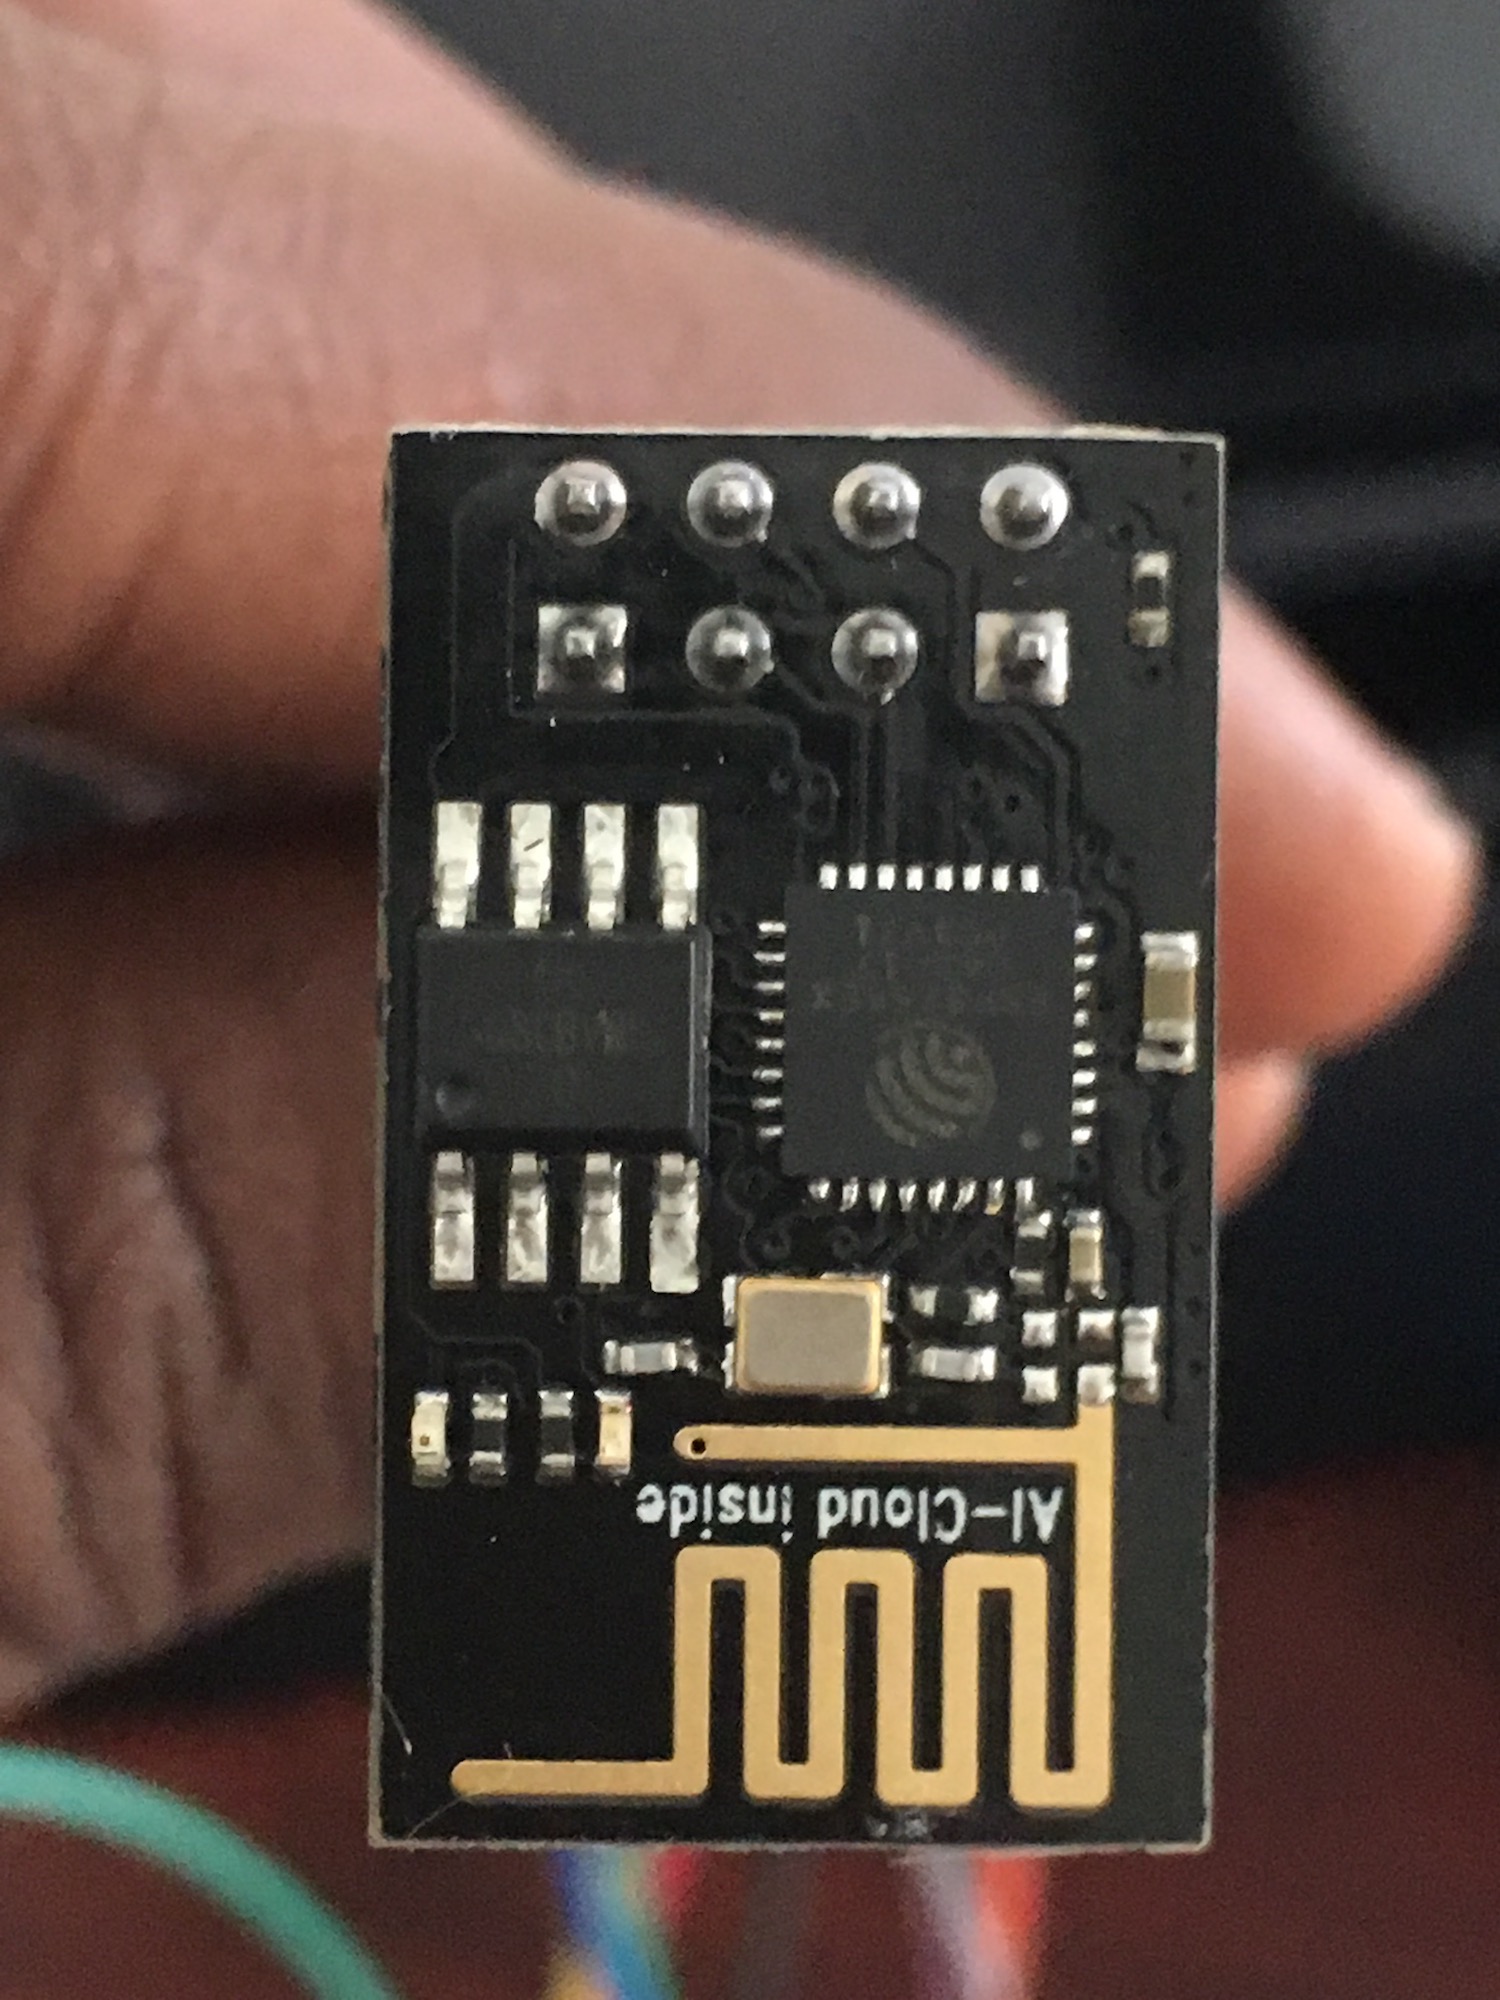
ESP8266-01: See how small it is.
This is a very small chip that costs less than $2. But it has really good specs compared with Arduino (Atmel ATmega). Let me show you a few of them:
- A complete WiFi stack, which can be used as a station, an access point or both at once.
- A complete TCP/IP stack with some cool libraries (such as mDNS)
- 4MB Flash (compared to 32KB Flash in Arduino)
- 64KB RAM (compared to 2KB in Arduino)
- GPIO ports (ranging from 2 to 16 in different models)
Getting started
You can use the Arduino IDE to program ESP8266 and it's a pretty active and a solid module.
But, this is a chip. It's not a developer friendly tool like Arduino.
Fortunately, there are development boards based on ESP8266 like NodeMCU. But, I didn't like that option. I wanted the raw experiences. So, I experimented a bit with ESP8266 and I got it working with the help of an Arduino.
But it was a chunky setup and things didn't worked really well.
Apparently, the root problem was the power supply. For an Arduino, it's quite okay to run it with USB power because Atmel ATmega is a pretty small chip. But ESP8266 is a pretty big one and it needs more power. The USB power that comes with the Arduino board is not good enough for it.
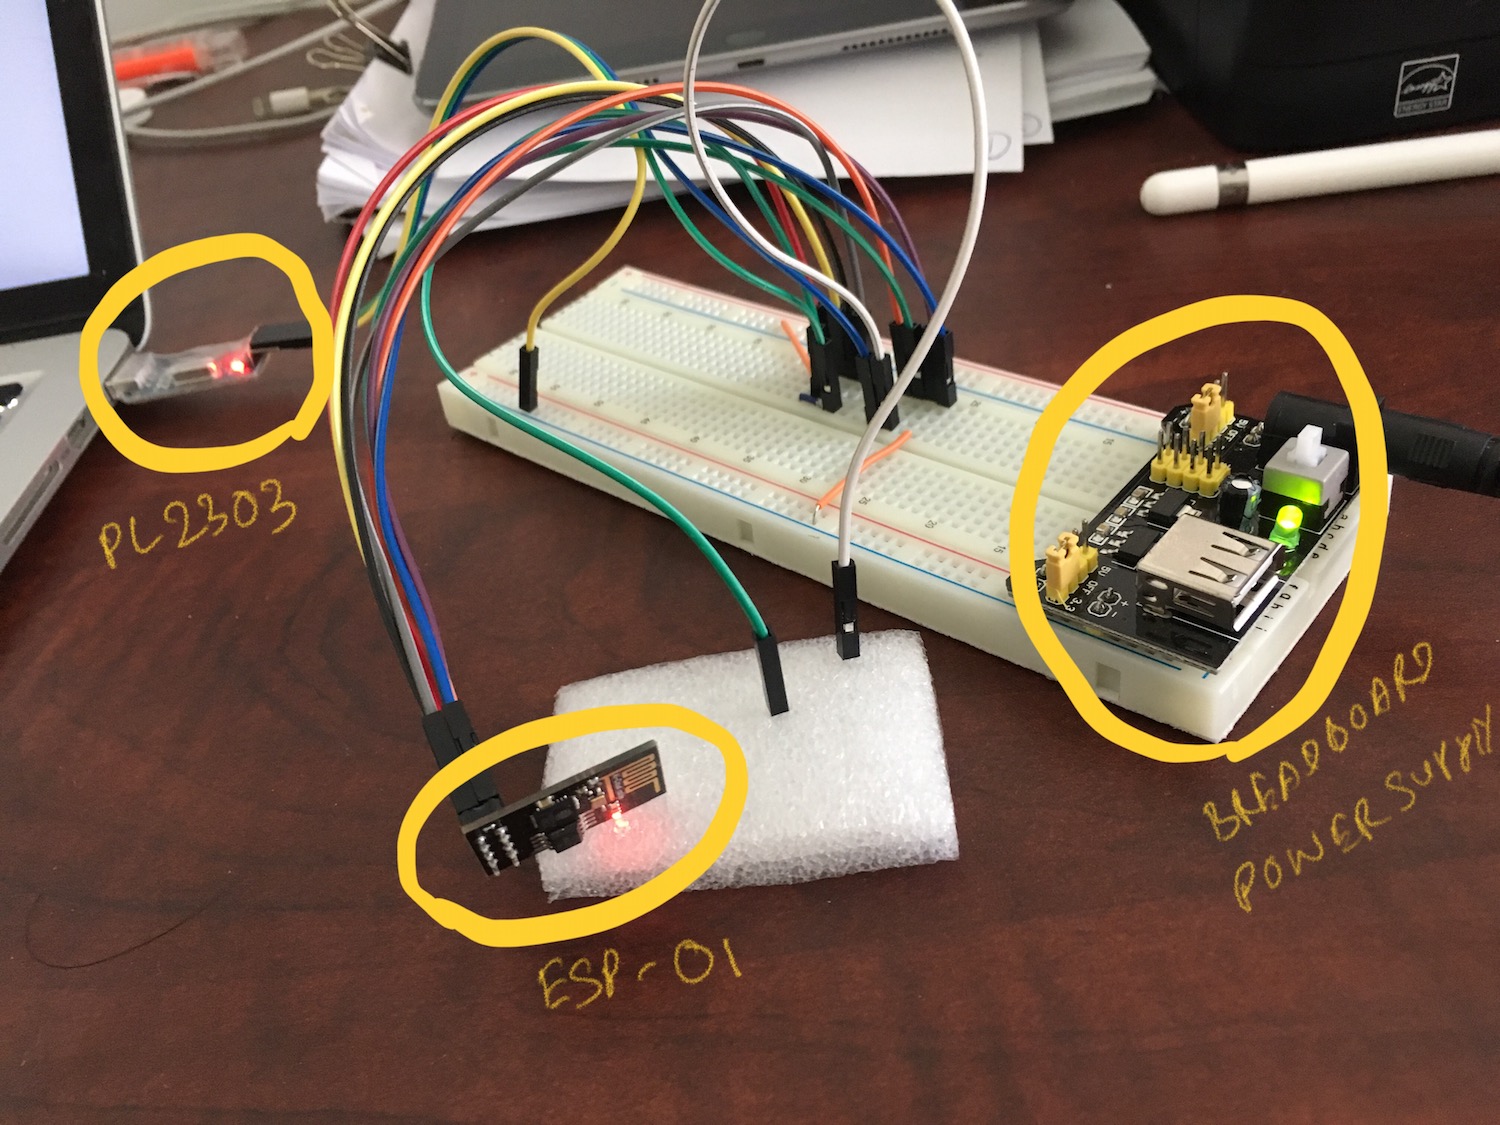
So, I experimented (and shopped) a little bit and came up with this setup.
My initial ESP8266 setup.
Now that it has its own power supply and direct USB connection bypassing Arduino via PL2303, it was working perfectly and I really liked it.
I'll save the details for a another blog post. It's a lot of information.
Dev Board
This setup works. But as you can see, there are a lot of wirings and it's really painful to set up from scratch. So, I came up with a simple, but useful dev board for my ESP8266.
Here it is:
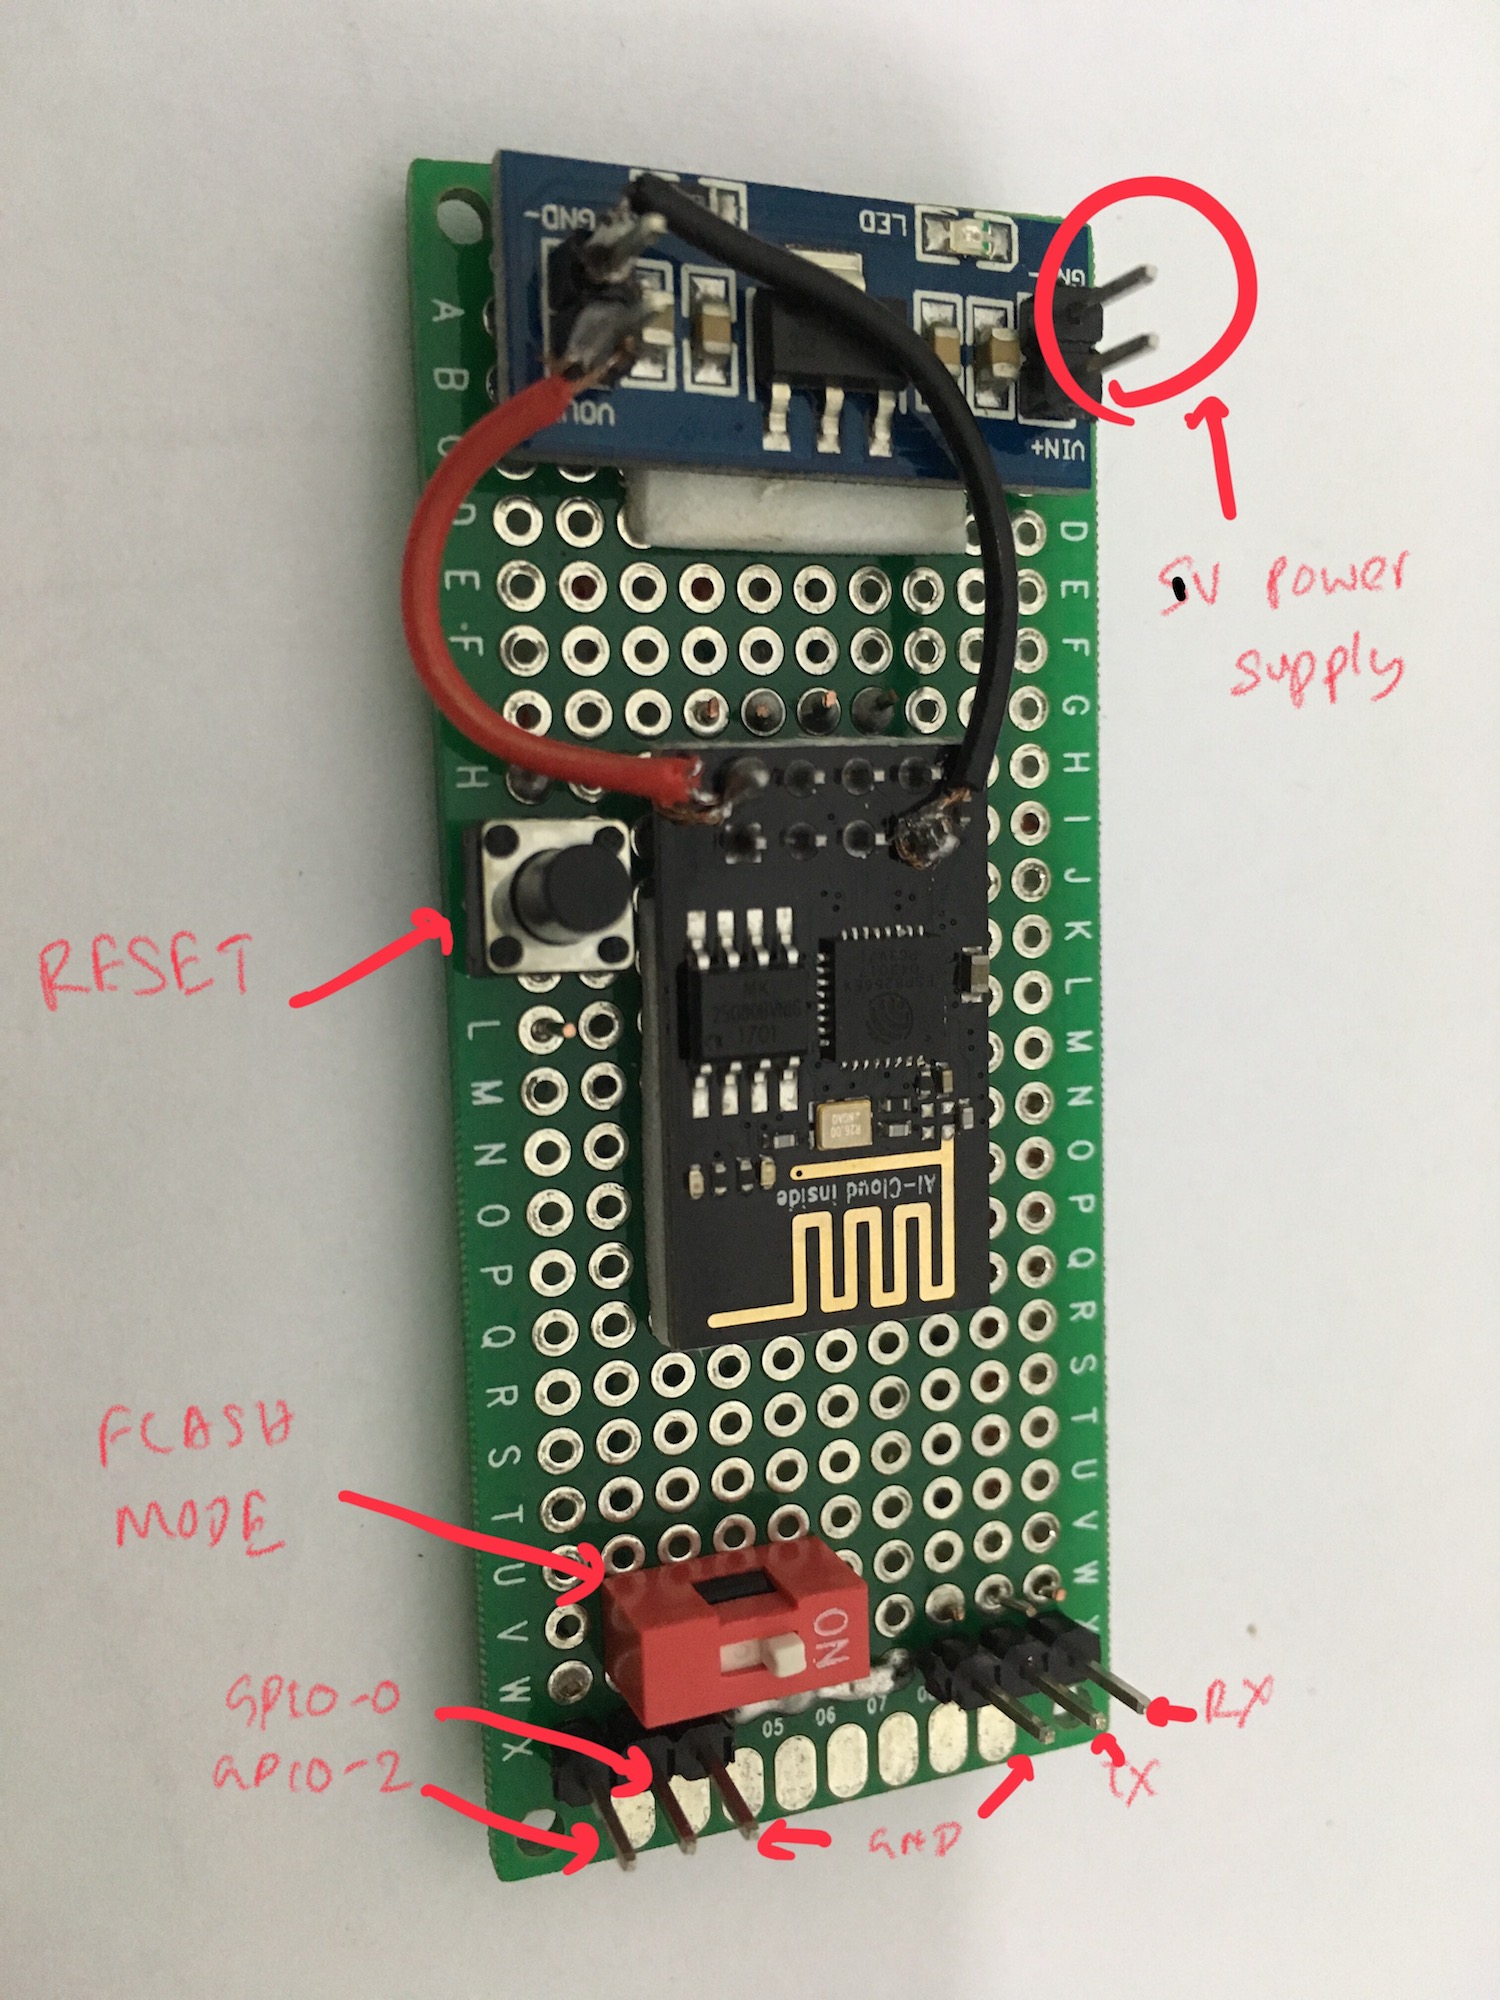
My ESP8266 dev board.
This is my first soldering job after a very long time. Fortunately, it worked on the first run and I'm so happy with it.
Now it's easy to plug in the device and program it using the Arduino IDE. It's not as easy as the Arduino board, but I like it because I designed it (and I know how it works).
This is a working setup with my ESP8266 Dev Board:
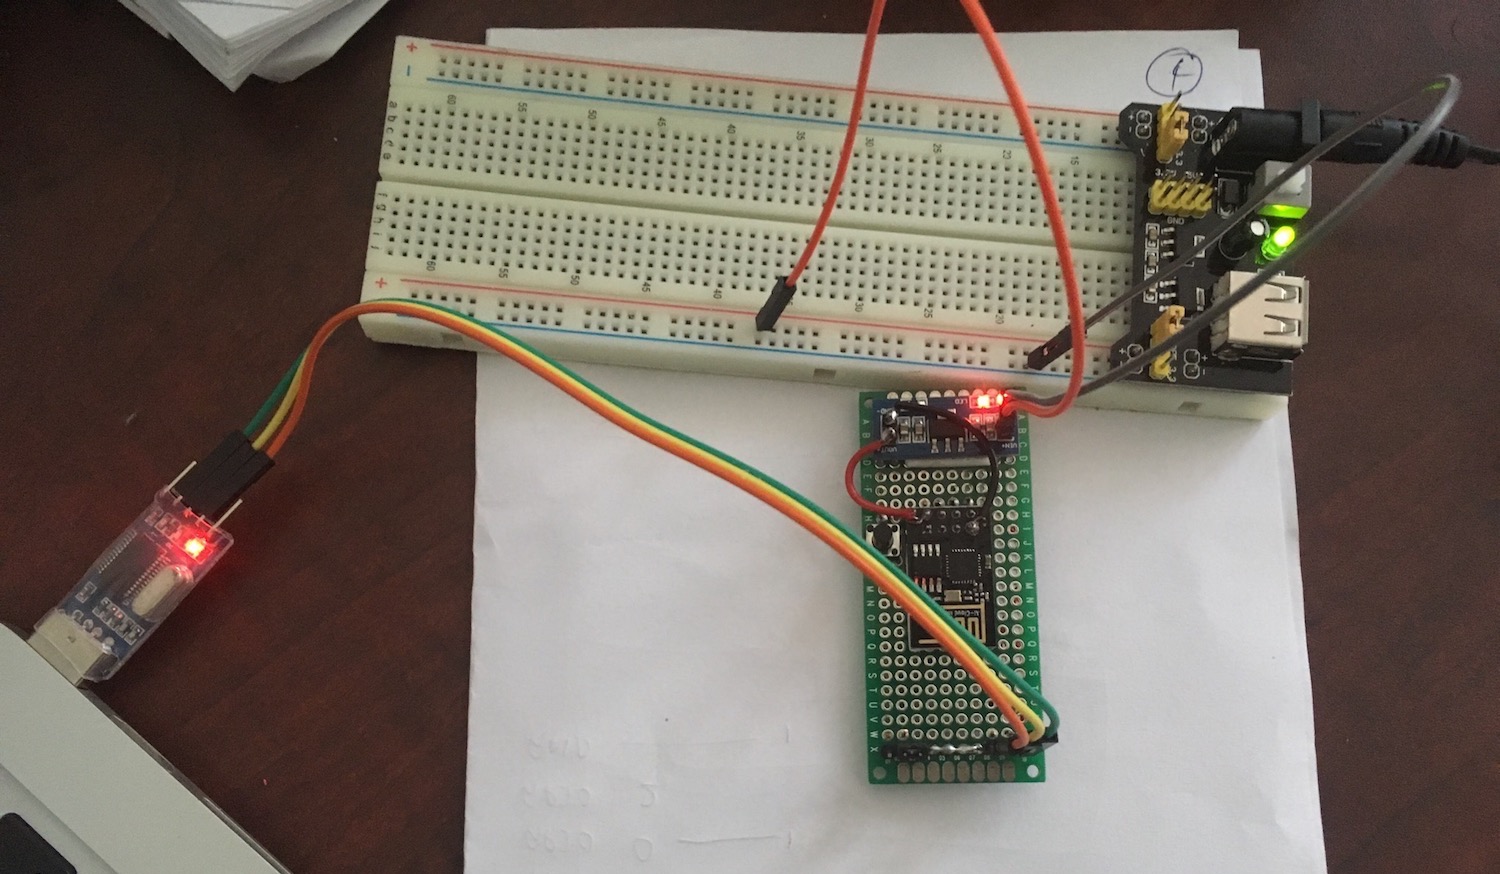
My ESP8266 dev board in action.
As you can see, now it's super clean compared to the previous setup.
What's the USE of ESP8266?
I should have mentioned this first rather than describing my experiments. There are a lot of things you could with this little device.
It could be a base for a WiFi-enabled Smart Bulb or any other connected Smart device.
I haven't fully explored what we can do with this yet, but I'll show you something I did.
With this little device, I can connect to my home WiFi network and start a web server inside this chip. Additionally, I can give it a domain name like arunoda-esp.local. So, I don't really need to know the IP address to access the web server.
This domain name thing was something very interesting to me. It's called mDNS and used by Apple, Philips Hue and some other smart devices. Frankly, setting that up in ESP8266 was very simple.
Here's the code for everything that I have described:
See, it's pretty straightforward. I want to thank developers who created these APIs and of course to the manufacturer of ESP8266, Espressif.
I'll have to do more experiments and I'll try to keep you updated.